
Explore the latest possibilities of Mobile Journalism through this tip sheet for attendees of the Pollcheck 2023 digital training series for journalists covering state elections in India.
Project details
Using phones to cover stories isn’t really a niche or unique skill. From TV news channels like NDTV to purely digital publications like The Quint, mobile journalism is an important tool for both their day-to-day and their special occasion coverage.
Slides from our Pollcheck 2023 training:
But what does it mean at an individual level? Are you a mobile journalist? It would be very hard not to be. From making calls to sources to filing stories, phones provide unparalleled portability and with that opportunity to become faster at things like communicating or coordinating so that you can free up more time for what most journalists really enjoy about their jobs… reporting and/or editing.
To us, mobile journalism is a mindset that you can report and publish a story using just your phone. Whether you’re on the go reporting in the field or from a newsroom or even your home.
This doesn’t mean that you can only call yourself a mobile journalist if you do everything on the phone — far from it! Your mobile is just one of many tools that can help you do your job. And our job is to help you understand how to make the most of that tool.
Why MoJo
Shooting videos on your phone when you’re out reporting can help you humanise your stories by allowing your audience to get to know your sources and hear the concerns of different communities in their own words. In the context of election reporting, this is a great way to get to the heart of which voting issues are the most important for different communities or individuals.
Many of you will already be working on stories like these.
For example, are farmers facing more erratic weather conditions every year leading to crop failures? And do they feel that the current government is doing enough to support them through crop failures? If not, do they have a candidate they believe will help them? Understanding what motivates people to vote is an important story to tell before people head to the polls. And having this pre-election reporting can also help you in the months after the election, when you go back to see if candidates have delivered on their promises. You will not only have visuals to reference for a written report, but also a potential follow-up video.
So, how does using your phone help you during this reporting?
We like to think of our phone as a notebook. We can go back to interviews from years ago to help us prepare for follow-up stories.
MoJo is also an opportunity to make your work stand out. Dozens of newsrooms cover state elections — so you’re competing with a lot of coverage when you work on election stories. If you are able to get original footage that even wire services like ANI can’t get, then that will immediately make your story look different from what others are covering. And then you can add value with the stock or wire footage your newsroom might already have access to.
Getting started
When we teach MoJo, we like to start with video skills, because the skills you need for video are the same one you need for photography or podcasting — that's recording good audio and framing good shots. So any time you make a video on your phone, you can turn it into a photo essay or an audio report with a few extra steps.
When you’re getting started on a story, storyboarding is a great way to plan and communicate your video structure.
Think of it as a comic strip. Or a powerpoint presentation.
Here's a template, that illustrates which visuals will accompany which lines of text:

Now it's time to take the story to edit.
The first thing that's important to know is that video is all about layers. Every layer adds value to the audience, whether it's the footage layer, or the text layer that tells you the name and designation of an interviewee, or it's the audio from your interview.
In the most simple forms of video, you only need three layers: the audio, the visual and the text. But as you become more comfortable with edits, you can start adding more layers.
When it comes to visuals, there are two terms that are helpful to know and understand. That's A-Roll and B-Roll.
A-Roll is typically your interview or piece to camera footage. It's the main layer on which you can add additional layers like logos and text.
But watching a talking head can get boring very quickly for your audience. That's where B-Roll comes in, it makes your video more visual. You use B-Roll to help your audience visually see what you or your sources are talking about. It's an important way to add context.
You'll have seen B-Roll in most videos with interviews. Any time you can hear a source but you can't see them on screen in a video you're watching, you're seeing B-Roll. As we head into our practical exercise, this will start to make more sense.
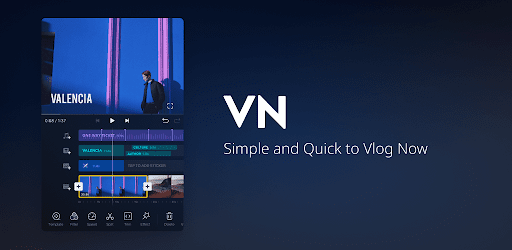
In this Google Drive link, you’ll find practice footage you can work with, based on the storyboard we had above. We’ll be editing on the free app VN Video Editor.
Practice footage:

Video editing app: VN Video Editor
Android:
iOS:

Getting audio right
Now, let's talk about audio, because recording good audio can be tricky, but rewarding.
You'll find that audiences are more forgiving of shaky video than illegible audio. That's why even in video calls, you can continue a conversation even if the video feed of the person you’re talking to freezes, but not if the audio is unclear.
And it can be hard to get clear audio in the field when there is a lot of background noise. Like at an election rally with blaring speakers. You can minimise, if not eliminate, background noise with the help of a mic.
There are many types of mics, and we recommend starting with a lav mic that you can clip onto yourself, or onto your source.

It's important to remember that not all mics work with all phones. You'll want to look for a TRRS jack (that stands for tip-ring-ring-stem), and not a TRS jack. And since many phones don't have headphone jacks these days, you may also need a converter.
Another important thing to remember is that for many Android phones, the mic is not going to work with the native camera app that comes installed on your phone already. That's why we recommend — especially for Android users — that you download a camera app called Protake.
Using Protake, you'll be able to keep an eye on your audio bars to make sure your audio is picking up.
Video recording app: Protake - Mobile Cinema Camera
Android:
iOS:

But the most important way to make sure your audio is working (and we can't stress this enough) is to do a scratch test. That means that you will literally scratch your mic while recording to make sure that your external mic — not your phone's inbuilt mic — is the one that's actually picking up the sound. Here’s what your scratch test should sound like, if it’s working:
Shooting visuals
Once you've got your audio down, we've got a few tips for shooting better visuals.
When you're shooting an interview or a piece to camera of yourself, you have a few options: you can use the photographic principle of the rule of thirds, where you align the eyes of your source (or you) to the intersecting point of the grid lines — you've probably seen this grid before. The other option is a symmetrical frame, where you or your source are in the center. This can be especially effective for square videos.
No matter what frame you choose, it's important to make sure you have enough head room. That is, leave a bit of space above your source's head, and a little below their head so that you can add subtitles or other text. This isn't always possible, sometimes when you're conducting an interview you may not have enough space to back away from your source a little, but do the best that you can. Similarly, try to have some depth between your source and their background. It's more visually interesting than having them backed up against a wall.
/w=3840,quality=90,fit=scale-down)
You also want to make sure that any source of light, like the sun or a lamp is behind you and not the interviewee. Otherwise, you're likely to get a silhouette effect. You'll also want to lock your exposure and focus so that your footage isn't jumpy if the source moves.
When you're ready to roll make sure your phone is on airplane mode. You don't want a call or a message from the newsroom interrupting your shoot.
Those are the basics for shooting a person, now let's talk a bit about your B-Roll. Your B-Roll really sets the scene for your audience. It gives you the context that your interview can't give.
For example, in this video about a community-protected forest, for the first 16 seconds, you only see B-Roll footage. The A-Roll of the interviewee speaking only appears at 0:17 seconds.
/w=3840,quality=90,fit=scale-down)
When you’re shooting B-Roll, you want to get a mix of wide, mid and close-up shots. Each type of shot sets a different context in the story, like you’ll see in the image below. If you only have close-ups, you will get great details of the material that the plastic signs are made of. But you'll be missing the full display, which you can reveal in a mid-shot. And if you want to add even more context, your wide-shot will help you illustrate to the audience where that plastic signs are situated. For example, if they're being sold off the back of a cycle.
You can never take too much B-Roll. The more of a variety of shots you come back from the field with, the easier your edit will be.
/w=3840,quality=90,fit=scale-down)
If you're following a source, you can also get long, mid and close-up shots of what they're doing. But what you don't want to do is direct your sources. Just like you wouldn't tell your source what to say in an interview, you won't tell them what to do or say on camera.
This is for a variety of reasons, for one you want to make sure your source isn't doing something they wouldn't typically do in their day-to-day life. For example, if they're a politician and you're asking them to discuss something specific with their constituents on camera, then you're not getting an authentic exchange, you're getting a performance.
The other reason it's better not to tell your source what to do on camera is because often that will make them uncomfortable — they're not professional actors — and that discomfort will show on their face.
So, if a source asks you what they should do while you're recording their B-Roll, just tell them to go about their day as if you weren't there. After a little bit of awkwardness, they'll probably get a little more comfortable with you following them around.
This video can help give you ideas for types of B-Roll shots you can take:
Sourcing visuals
Sometimes, you can’t go into the field to shoot. Whether it’s because you’re in an area that’s under lockdown, or there’s just so much breaking news that you can’t afford to leave the newsroom. That's where stock visuals come in. You have a decent number of options online, but you're unlikely to get anything too location specific.
/w=3840,quality=90,fit=scale-down)
If generic visuals will do the trick, you can use Pexels or Pixabay to find footage of some footage of India's largest cities. Most of this footage will be copyright free, but it's still important to double check. Each image will have copyright information you can rely on before you download it.
You can also head to Archive.org, which has old footage from news reports and documentaries that are decades old. For example, if you're doing an explainer on the history of India as part of your election coverage, you can find footage of Indian independence and Gandhi on Archive.org. Just like you would with stock visuals, make sure what you're selecting is copyright free.
Wikimedia is another great source for historical visuals. On Wikimedia you'll mostly find photos — which is great! But when you have the option to choose between photos and video to put into your video story, always opt for video — it will be more visually interesting for your audience.
You want to avoid copyright strikes as they can be a little lengthy to dispute and can harm your channels. So make sure you get permission to use any footage you receive from other people in writing.
And when you do receive from others — even if it's from a reporter in your newsroom — it's always important to ask them if they are the ones who shot it before you use it in the video. In breaking news situations, people will often forward footage via channels like WhatsApp. But it may not be their original footage. It's always important to know the original source of the footage and have permission from that original source. Asking these questions will help prevent you from spreading any false information or fake news, which is everywhere these days.
One other trick we like to use is Google Earth Studio to help the audience get the context of where something is happening. This trick is also a great filler for when you don't have much footage.
Optimising your video for better reach
/w=3840,quality=90,fit=scale-down)
There are a few ways you can help make your video break through when it's published.
The first few thing you do when you're editing your video. Pay close attention to what you put in your first ten seconds. You'll want to start with the most powerful quote and/or visual you can. If you want to bring in your organisation's logo, consider doing that a little later in the video, like 20-30 seconds in — once you've already hooked your audience and they've decided they're going to watch your video.
Secondly, make sure that your text size is large enough throughout the video, so that it can be read easily on the phone screen. And if you have interviews, subtitle them — even if your source is speaking the same language that your audience speaks. Most audiences watch videos with the sound off — whether they're in a meeting or on the metro — so you'll want them to be able to follow your story, even with the sound off. Subtitles also make your video accessible to a wider audience as people who are deaf or hard of hearing will also be able to follow along if they're watching a video with subtitles.
After you've exported your final video, make a thumbnail for it. This is like a book cover to give your audience a little teaser of what to expect in your video.
In your title, description and tags, key words will be essential and you'll want to try different combinations of keywords in each.
Conclusion
We hope these tips will help you feel more confident about getting started in MoJo for elections. If you’ve never edited a video before, don’t be surprised if your first video takes a few hours. As you start practicing, it will take you less and less time. You may even reach a point where it takes you less than 20 mins to edit a video!
If you ever need help, or you’re facing technical difficulties, you can always email us at editor [at] inoldnews.com
Good luck out there! We can’t wait to see what you do.